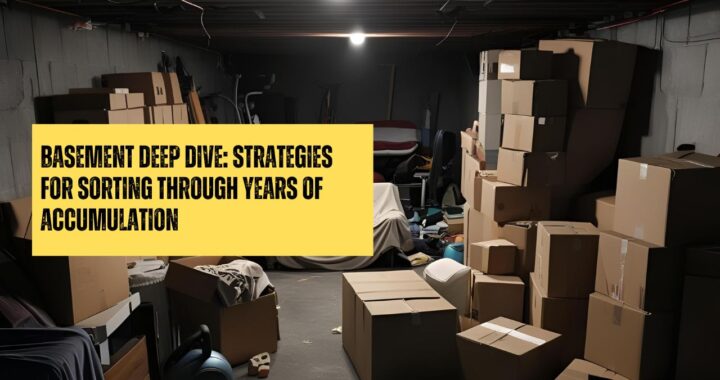
Ah, the basement. For many of us, it’s the land down below where things go… and often stay. Out of sight, out of mind, right?
Over years, or even decades, basements can become unintentional storage lockers for everything from broken furniture and forgotten hobbies to boxes whose contents are a complete mystery.
Looking at it all can feel like standing at the base of Mount Clutter, overwhelming, daunting, and hard to know where to even begin.
If your basement feels more like an archaeological site than usable space, take a deep breath. You’re not alone! Basements are designed for storage, making them prime candidates for accumulation.
But reclaiming that space is possible. It takes patience and a plan, focusing on sorting through the past to make way for the present.
Let’s dive into some strategies to tackle that basement buildup.
Why Basements Become Black Holes
It helps to understand why basements often get so cluttered. They’re usually large, out of the way, and sometimes feel less like “part of the house.” This makes them easy targets for dropping off items you don’t want to deal with “right now.”
Add poor lighting and maybe a touch of dampness, and it’s no wonder things get left undisturbed for ages, multiplying over time. Recognizing this pattern can help you approach the task with understanding, not just frustration.
Step 1: Mentally Prepare and Make a Plan (of Attack!)
Before you even move a box, get your head in the game. Acknowledge that this is likely a multi-session project, not a quick Saturday fix. Look at your calendar and schedule specific, realistic blocks of time dedicated solely to the basement. Maybe it’s two hours every Saturday morning for a month, or one evening a week.
Having scheduled time makes it feel like a manageable project rather than an endless chore. Also, decide where you’ll sort. If possible, clear a small working zone within the basement itself.
Step 2: Divide and Conquer Zone by Zone
Trying to tackle the entire basement at once is the fastest way to feel defeated. Instead, mentally divide the space into smaller, distinct zones. Maybe Zone 1 is the area near the stairs, Zone 2 is that back corner piled high, Zone 3 is under the workbench.
Pick one zone to start with, preferably the easiest or smallest one to build momentum. Commit to focusing only on that zone until it’s reasonably sorted before moving to the next.
Step 3: One Box, One Pile at a Time
Within your chosen zone, narrow your focus even further. Don’t just gaze vaguely at the entire section. Pick one specific pile or one specific box to start with. Your goal is to handle every single item within that small target area.
Resist the temptation to just shift boxes around, actually open them and deal with the contents. This micro-focus makes the task feel much less intimidating.
Step 4: Set Up Sorting Stations
As you handle each item from your chosen box or pile, you need to make an immediate decision. Set up clearly defined temporary spots nearby for three main categories:
1. Keep: Items you genuinely need, use, or have a definite plan for in your current life.
2. Let Go (Donate/Sell/Give Away): Things that are still usable but no longer needed by you.
3. Discard (Trash/Recycle): Broken items, actual garbage, things beyond repair or usefulness.
Physically move each item to its designated spot immediately. This prevents creating new “maybe” piles.
Step 5: Asking the Tough Basement Questions
Basements often hold specific types of clutter. Be prepared to ask yourself some honest questions, especially for items that have been down there a long time:
- Mystery Boxes: If you truly don’t know what’s inside, you likely haven’t needed it. Be brave and open it, but be ready to let go quickly if the contents aren’t essential.
- Forgotten Projects/Hobbies: That half-finished model airplane from 10 years ago? The brewing kit you used once? Be realistic – will you actually finish or restart this? Or is it time to let the supplies go?
- “Just In Case” Items: Old furniture, spare parts for appliances you no longer own, extra building materials. Ask: What’s the realistic likelihood I’ll need this? Could I get it another way if the need arose?
- Sentimental Items: Basements often hold inherited items or childhood memorabilia. Acknowledge the feeling, maybe take a photo, but ask if keeping the physical item is the only way to honor the memory (See our post on sentimental clutter!).
Step 6: Get the “Let Go” and “Discard” Piles OUT!
This is critical for motivation! As soon as you finish a zone or fill up bags/boxes for donation or trash, get them out of the basement and out of your house as quickly as possible. Schedule a donation pickup, plan a trip to the center, or take out the trash.
Seeing the physical space clear out provides a huge psychological boost and prevents you from second-guessing your decisions or letting those piles become permanent fixtures.
Remember to check local guidelines for disposing of items like old paint or electronics.
Embrace the Process, Celebrate Progress
Clearing out years of basement accumulation is a marathon, not a sprint. There will be days you make huge progress and days you only manage one box – that’s okay! Focus on consistency and celebrate every small win. Every bag that leaves, every shelf cleared, every square foot of floor you can see again is a victory.
Keep chipping away, zone by zone, box by box, and you will reclaim your basement space.
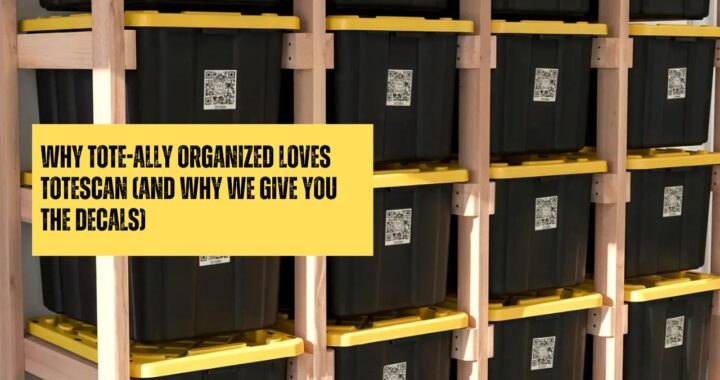
Tote-Ally Organized
Tote-Ally Organized designs and builds custom residential tote racks for garages, basements, and storage spaces. Our heavy-duty racks maximize space, improve organization, and include ToteScan QR labels for easy inventory management, homeowners declutter with confidence.
Feeling inspired to organize your garage or basement storage? If you’re in the Omaha or Lincoln area, let’s talk about creating a custom tote rack system tailored to your space and needs.